A die casting shot sleeve repair can restore a worn sleeve and extend its service life when the damage remains within a safe repair range. However, not every damaged shot sleeve should be repaired.
Wear, scoring, erosion, deformation, and thermal fatigue can affect sleeve performance over time.

Therefore, the first step is not repair itself. It is a proper inspection to determine the damage level and the best solution.
For die casting manufacturers, the key question is simple: Can the shot sleeve be safely repaired, or should it be replaced?
When Does a Shot Sleeve Need Repair?
A shot sleeve usually needs attention when its internal surface or geometry no longer meets the requirements of the injection system.
Inner Diameter Wear
The inner diameter gradually wears as the plunger tip moves through the sleeve during production.
Excessive wear can increase the clearance between the sleeve and plunger tip. As a result, the injection process may become less stable and metal leakage can increase.
Minor wear may be suitable for machining or reconditioning if enough wall thickness remains.
Scratches and Scoring
Long scratches or scoring can appear on the inner surface.
They may result from:
- Poor lubrication
- Foreign particles
- Incorrect plunger tip clearance
- Plunger tip damage
- Abnormal thermal conditions
Small surface damage may be corrected through suitable machining or polishing. Deep scoring requires a more detailed inspection.
Erosion Around the Pouring Area
The area near the metal pouring point can experience strong thermal and mechanical stress.
Repeated contact with molten metal may cause local erosion or surface damage.
The repair method depends on the depth and location of the damage.
Deformation and Ovality
Repeated heating and cooling can cause dimensional changes.
A sleeve may develop:
- Ovality
- Local deformation
- Loss of straightness
- Uneven internal wear
These problems cannot be judged accurately by visual inspection alone. Dimensional measurement is necessary.
Cracks and Thermal Damage
Thermal cycling can create cracks, especially when the sleeve experiences large and repeated temperature changes.
A visible crack should never be ignored.
Before repair, the crack depth, location, and cause should be checked. Severe cracking or structural damage may make replacement safer and more economical.
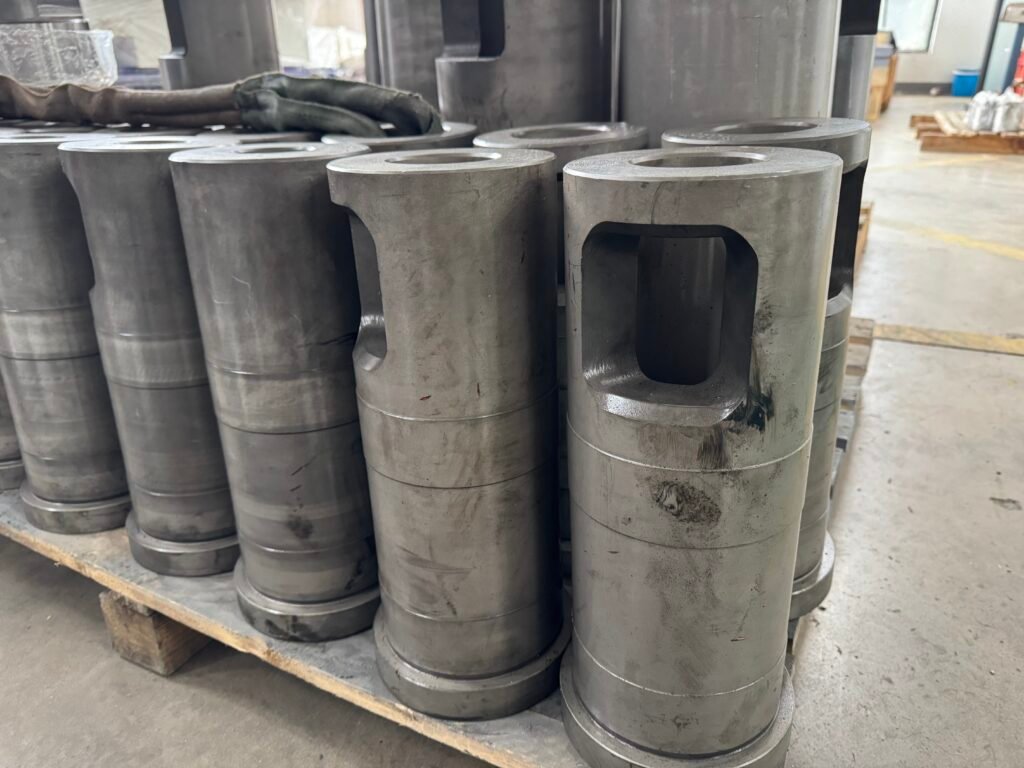
How to Inspect a Damaged Shot Sleeve
A good die casting shot sleeve repair process starts with inspection.
Measure the Inner Diameter
Measure the internal diameter at several positions along the sleeve.
This helps identify:
- Local wear
- Diameter changes
- Taper
- Ovality
The measured values should be compared with the original drawing or the manufacturer’s specifications.
Check Straightness
A sleeve may look normal from the outside but still have internal deformation.
Straightness is important because the plunger tip must move smoothly through the sleeve.
Inspect the Internal Surface
Look for:
- Scratches
- Pitting
- Erosion
- Cracks
- Metal buildup
- Abnormal wear
A borescope can help inspect areas that are difficult to see directly.
Check for Cracks
When cracks are suspected, suitable non-destructive testing methods can help confirm the damage.
The exact method depends on the sleeve material and repair requirements.
Check Wall Thickness
Wall thickness is another important factor.
If too much material has been lost, machining the inner diameter again may leave insufficient wall thickness.
In that case, replacement may be safer than repair.

How Is a Die Casting Shot Sleeve Repaired?
The repair method depends on the type and depth of the damage.
Honing and Precision Machining
Honing or precision machining can remove minor surface damage and restore the internal diameter.
This method works best when the sleeve still has enough material and the damage remains relatively shallow.
The final dimensions must meet the required tolerance.
Polishing
Polishing can improve the internal surface after machining.
It is useful when surface roughness affects the movement of the plunger tip.
However, polishing cannot repair deep cracks or serious deformation.
Welding and Material Build-Up
For some local damage, a suitable welding or metal build-up process may restore the damaged area.
The repair procedure must match the original sleeve material.
After welding, the repaired area normally requires further machining to restore the correct internal geometry.
Improper welding can create new thermal stress, so this method should only be performed by a qualified repair specialist.
Final Machining
After material removal or build-up, the sleeve needs final machining.
The goal is to restore:
- Internal diameter
- Roundness
- Straightness
- Surface condition
The repaired sleeve should then undergo final dimensional inspection before installation.
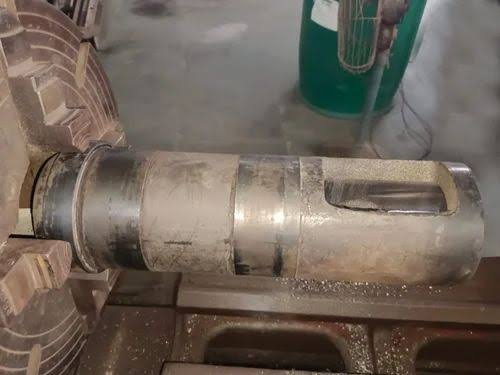
Shot Sleeve Repair vs. Replacement
Repair is not always the best option.
| Condition | Repair | Replacement |
|---|---|---|
| Minor surface wear | ✓ | |
| Light scoring | ✓ | |
| Local erosion | ✓ | |
| Moderate dimensional wear | ✓* | |
| Severe ovality | ✓* | |
| Deep structural crack | ✓ | |
| Excessive wall loss | ✓ | |
| Severe deformation | ✓ | |
| Repair exceeds dimensional limits | ✓ |
The final decision depends on the original sleeve design, remaining material, and repair allowance.
A simple rule is:
If repair can restore the required dimensions without weakening the sleeve, repair may be practical.
If the damage affects structural integrity or leaves insufficient material, replacement is usually the safer choice.
Why Does a Shot Sleeve Wear Out?
Understanding the cause is just as important as repairing the damage.
Thermal Cycling
A shot sleeve experiences repeated heating and cooling.
Large temperature changes can create thermal stress over time and contribute to deformation or cracking.
Plunger Tip Wear
The shot sleeve and plunger tip work as a pair.
A worn or incorrectly sized plunger tip can increase friction, damage the sleeve surface, and create abnormal clearance.
Therefore, repairing the sleeve without checking the plunger tip may only solve half the problem.
Poor Lubrication
Insufficient or improper lubrication can increase friction between the sleeve and plunger tip.
Too much lubricant can also create process problems.
The lubrication method should match the machine, alloy, and production conditions.
Foreign Material
Metal particles or other contaminants can scratch the internal surface.
Keeping the sleeve and plunger system clean helps reduce this type of damage.
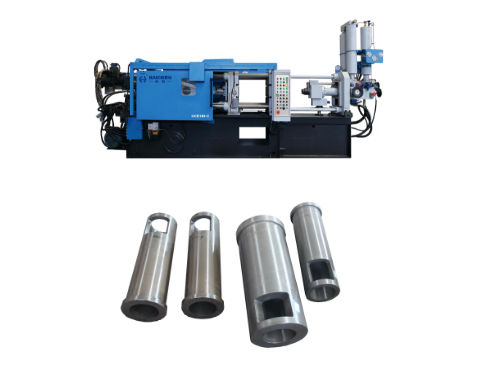
Why Plunger Tip Condition Matters After Shot Sleeve Repair
A repaired shot sleeve should not be installed without checking the plunger tip.
The two components need to work together with the correct clearance.
For example, installing a repaired sleeve with a heavily worn plunger tip can lead to:
- Excessive clearance
- Metal leakage
- Uneven wear
- Poor injection performance
- Faster damage to the repaired sleeve
Therefore, a proper maintenance check should include both:
Shot Sleeve + Plunger Tip
If one component shows serious wear, inspect the other before restarting production.
How to Extend Shot Sleeve Service Life
Repair can reduce downtime, but prevention is even better.
Control Sleeve Temperature
Stable temperature control can help reduce excessive thermal stress.
The cooling system should match the sleeve design and production conditions.
Maintain the Plunger System
Regularly check:
- Plunger tip wear
- Tip clearance
- Lubrication
- Alignment
- Abnormal noise or friction
Small problems are easier to solve before they damage the sleeve.
Monitor Injection Conditions
Abnormal injection speed, pressure, or metal temperature can increase stress on the shot system.
Process parameters should remain within the machine and mold manufacturer’s recommended range.
Inspect the Sleeve Regularly
Do not wait until the machine shows a major injection problem.
Periodic inspection can identify wear before it becomes a serious failure.
When Should You Replace Instead of Repair?
Replacement is normally worth considering when:
- The sleeve has a serious crack.
- Wall thickness has fallen below the safe limit.
- Severe deformation remains after machining.
- The internal diameter cannot be restored within specification.
- Repair would remove too much material.
- The cost and downtime of repeated repair exceed the value of a new sleeve.
In other words, repair should restore the sleeve without creating a new structural risk.
If that cannot be achieved, replacement is the better choice.
How Long Can a Repaired Shot Sleeve Last?
There is no single service-life number that applies to every repaired shot sleeve.
Actual life depends on:
- Sleeve material
- Alloy
- Metal temperature
- Injection conditions
- Plunger tip condition
- Lubrication
- Cooling
- Repair quality
- Production cycle
For this reason, manufacturers should avoid using a fixed number of shots as a universal replacement or repair rule.
Instead, monitor actual wear and compare dimensional measurements with the sleeve’s original specifications.
Practical Checklist for Shot Sleeve Repair
Before returning a repaired sleeve to production, check:
Sleeve
- Internal diameter
- Roundness
- Straightness
- Wall thickness
- Surface condition
- Cracks
Plunger System
- Plunger tip condition
- Clearance
- Alignment
- Lubrication
Production System
- Sleeve temperature
- Cooling condition
- Injection parameters
- Abnormal leakage
- Abnormal friction
This simple checklist can help prevent a repaired component from failing again soon after installation.
FAQ About Die Casting Shot Sleeve Repair
Can a worn shot sleeve be repaired?
Yes. Minor or moderate wear may be repairable through machining, honing, polishing, or other suitable processes. The final decision depends on the remaining material and required dimensions.
Can a cracked shot sleeve be repaired?
Some local cracks may be repairable after proper inspection. However, deep or structural cracks can make replacement a safer option.
Is it better to repair or replace a shot sleeve?
It depends on the damage. Repair is suitable when the sleeve can return to its required dimensions without compromising strength. Severe deformation, deep cracks, or excessive wall loss usually favor replacement.
Should the plunger tip be checked during shot sleeve repair?
Yes. The shot sleeve and plunger tip work together, so checking only one component can leave the original problem unresolved.
What causes shot sleeve wear?
Common causes include thermal cycling, plunger tip wear, poor lubrication, foreign particles, abnormal clearance, and unsuitable production conditions.
How can I choose a replacement shot sleeve?
Check the machine model, sleeve dimensions, material, pouring opening, plunger system, and mold requirements. For custom applications, provide the original drawing or detailed dimensions to the manufacturer.
Final Thoughts
Die casting shot sleeve repair is not simply a machining job. The repair must restore the sleeve’s internal geometry while maintaining safe wall thickness and proper cooperation with the plunger system.
For minor wear and surface damage, precision machining or reconditioning may extend service life. However, serious cracks, deformation, or excessive material loss may make replacement the better choice.
From a die casting machine manufacturer’s perspective, the best approach is to inspect the complete shot system rather than looking at the sleeve alone.
A good repair restores the component. A good maintenance plan prevents the same problem from coming back.


