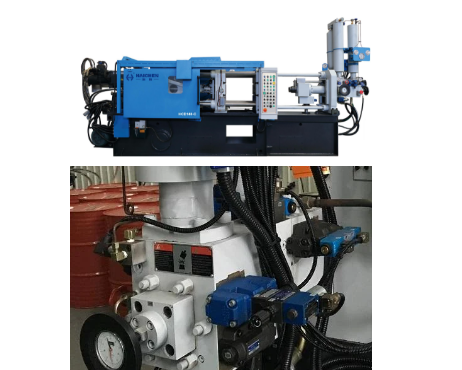
Hydraulic valve problems in die casting machines can cause low pressure, slow machine movement, oil leakage, unstable injection, or complete equipment shutdown.
Fortunately, many hydraulic valve failures can be identified through a simple troubleshooting process.
First, technicians should identify the machine symptom.
Then, they can check the hydraulic oil, valve body, spool, seals, solenoid, and electrical signals.
Finally, the valve can be cleaned, repaired, adjusted, or replaced according to the actual fault.
Therefore, understanding hydraulic valve troubleshooting can help reduce downtime and keep a die casting machine running reliably.
For manufacturers using hydraulic die casting machines, regular valve inspection is also important because contamination, wear, incorrect pressure settings, and electrical faults can gradually affect machine performance.
What Does a Hydraulic Valve Do in a Die Casting Machine?
A hydraulic valve controls the direction, pressure, or flow of hydraulic oil inside the machine.
In a die casting machine, hydraulic valves work with pumps, cylinders, accumulators, sensors, and control systems to control important machine movements.
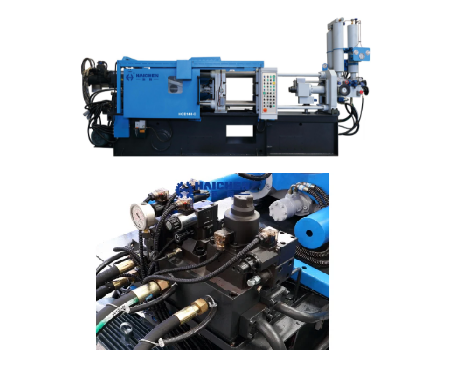
For example, hydraulic valves can control:
- Mold opening and closing
- Injection movement
- Ejection
- Hydraulic pressure
- Oil flow
- Auxiliary movements
As a result, even a small valve problem can affect the entire production cycle.
However, not every machine problem comes from the hydraulic valve itself. A faulty pump, contaminated hydraulic oil, damaged seal, electrical signal, or pressure sensor can create similar symptoms.
That is why a systematic troubleshooting process is important.
Common Hydraulic Valve Problems in Die Casting Machines
The most common hydraulic valve problems include:
- Hydraulic oil leakage
- Valve spool sticking
- Low hydraulic pressure
- Unstable pressure
- Slow machine movement
- Solenoid valve failure
- Contaminated valve components
- Excessive valve wear
The following table provides a quick troubleshooting reference.
| Machine Symptom | Possible Cause | What to Check | Common Solution |
|---|---|---|---|
| Oil leakage | Damaged seal or loose connection | O-rings, fittings and valve body | Replace seals or tighten connections |
| Low pressure | Relief valve, pump or leakage problem | System pressure and valve response | Inspect and repair the faulty component |
| Pressure fluctuation | Contamination or unstable relief valve | Pressure gauge and valve | Clean, adjust or replace |
| Slow movement | Restricted oil flow | Flow-control valve and filter | Clean or replace |
| Valve does not respond | Solenoid or electrical fault | Coil, wiring and control signal | Repair electrical fault or replace coil |
| Spool sticking | Contaminated oil or wear | Spool and valve bore | Clean or replace damaged parts |
| External oil leakage | Seal failure | Valve seals and joints | Replace seals |
This table can also help operators decide whether the problem is likely to come from the valve or another part of the hydraulic system.
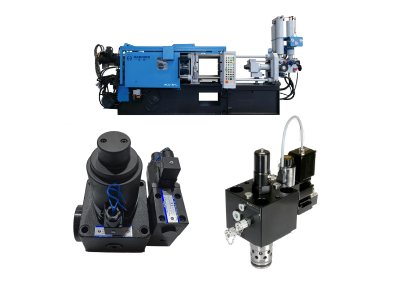
Hydraulic Valve Troubleshooting: Step-by-Step
Before repairing a hydraulic valve, always follow the machine manufacturer’s safety procedures.
In particular, shut down the machine and release hydraulic pressure before removing hydraulic components.
1.Check the Hydraulic Oil
First, check the hydraulic oil level and condition.
Contaminated hydraulic oil can carry metal particles, dust, or other debris into the valve. Over time, these contaminants may interfere with spool movement and small internal passages.
Also check whether the oil shows signs of:
- Contamination
- Abnormal color
- Foaming
- Water contamination
- Excessive temperature
If the oil is contaminated, simply replacing the valve may not solve the problem.
The hydraulic system itself should also be cleaned and the filtration system inspected.
2.Check for External Oil Leakage
Next, inspect the outside of the hydraulic valve.
Look for oil around:
- Valve joints
- O-rings
- Pipe connections
- Valve mounting surfaces
- Hydraulic hoses
A loose connection may cause a simple external leak. However, a damaged seal or scratched sealing surface may require component replacement.
Therefore, technicians should identify the exact leakage point before disassembling the valve.
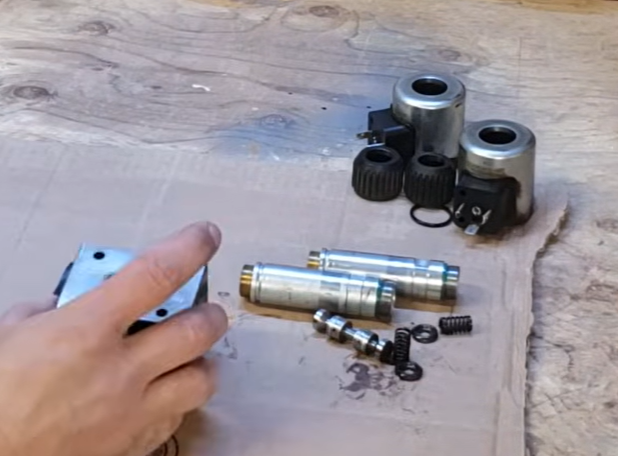
3.Check the Valve Spool
The spool is one of the most important moving components inside many hydraulic valves.
If contamination or wear prevents the spool from moving smoothly, the valve may fail to switch correctly.
Typical symptoms include:
- Slow machine movement
- Incorrect actuator movement
- Failure to switch
- Unstable hydraulic pressure
After removing the valve according to the manufacturer’s instructions, technicians can inspect the spool for contamination, scratches, corrosion, or abnormal wear.
If the spool is damaged, cleaning alone may not restore the valve.
4.Check the Solenoid Valve
Many hydraulic valves on modern die casting machines use solenoid control.
If the valve does not respond, the problem may come from either the hydraulic side or the electrical side.
Therefore, technicians should check:
- Solenoid coil
- Wiring
- Connectors
- Control voltage
- PLC output signal
- Manual override, if equipped
If the electrical signal reaches the solenoid but the valve does not operate, the solenoid or valve itself may require further inspection.
On the other hand, if there is no control signal, replacing the hydraulic valve may not solve the problem.
5.Check Hydraulic Pressure
Low or unstable hydraulic pressure is another common symptom.
However, low pressure does not automatically mean that the hydraulic valve is faulty.
The technician should also inspect:
- Hydraulic pump
- Relief valve
- Pressure sensor
- Hydraulic filter
- Oil level
- Internal leakage
- Valve settings
For this reason, pressure should be measured with suitable test equipment and compared with the machine manufacturer’s specifications.
Avoid changing pressure settings randomly because incorrect adjustment may create additional machine problems.
Common Causes of Hydraulic Valve Failure
Hydraulic Oil Contamination
Contaminated oil is one of the most common causes of hydraulic valve problems.
Small particles can enter the valve and interfere with spool movement. In addition, contamination can accelerate wear between precision valve components.
Therefore, good oil filtration and regular inspection are essential.
Seal Aging
Hydraulic seals work continuously under pressure and temperature changes.
Over time, seals can harden, crack, deform, or lose their sealing ability.
As a result, the system may develop external or internal leakage.
Replacing the correct seal with the proper material and size can restore sealing performance.
Valve Wear
Long-term operation can gradually wear the spool, valve bore, springs, and other internal components.
Furthermore, contaminated oil can accelerate this process.
When wear becomes excessive, repairing individual components may no longer be economical. In that situation, replacing the valve may be the better choice.
Electrical Failure
Modern die casting machines use electrical signals to control many hydraulic valves.
Consequently, a hydraulic valve that appears to have failed may actually have:
- A damaged solenoid coil
- Loose wiring
- Poor connector contact
- Incorrect control signal
- PLC-related problems
Checking the electrical signal before replacing the valve can prevent unnecessary component costs.
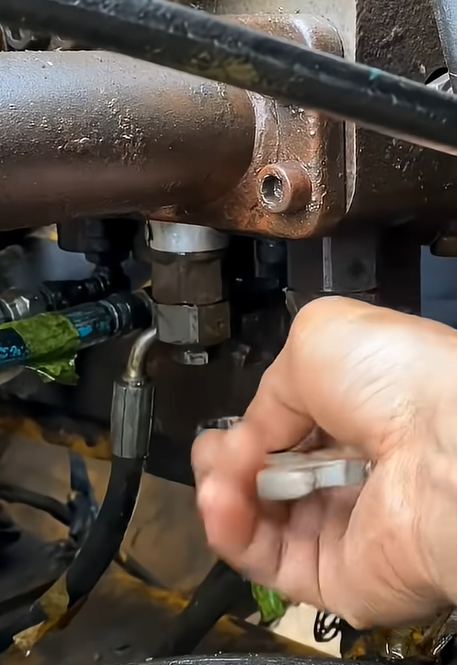
Hydraulic Valve Repair Procedure
When a hydraulic valve requires repair, technicians should follow a controlled process.
Step 1: Shut Down the Machine
First, stop the die casting machine and follow the manufacturer’s lockout and pressure-release procedures.
Hydraulic systems can retain significant pressure even after the main pump stops.
Therefore, never remove a hydraulic valve from a pressurized system.
Step 2: Remove and Mark the Valve
Before removing the valve, record its installation position and hydraulic connections.
Taking photographs can also help prevent incorrect reassembly.
Step 3: Clean the Components
After disassembly, clean the valve body, spool, passages, and other components with a suitable cleaning method.
Avoid using tools that can scratch precision surfaces.
Step 4: Inspect Internal Components
Check the spool, valve bore, springs, seals, and other components for:
- Scratches
- Wear
- Corrosion
- Deformation
- Contamination
If a component exceeds the manufacturer’s service limits, replace it rather than continuing to use it.
Step 5: Replace Damaged Seals
Replace worn or damaged O-rings and other seals with components that match the original specifications.
In addition, make sure the sealing surfaces are clean before assembly.
Step 6: Reassemble and Test
After reassembly, install the valve correctly and gradually restore hydraulic pressure.
Then check:
- Oil leakage
- Pressure stability
- Valve response
- Machine movement
- Solenoid operation
Finally, run the machine through several cycles to confirm stable operation.
Should You Repair or Replace a Hydraulic Valve?
Not every failed hydraulic valve needs to be replaced.
In some cases, the problem is caused by:
- Contamination
- Seal damage
- Loose connections
- Solenoid failure
- Minor component wear
These problems may be repairable.
However, replacement may be more appropriate when the valve body, spool, or precision surfaces have severe damage.
The decision should consider:
Repair cost + downtime + spare parts availability + expected service life.
For imported or discontinued valves, repair can sometimes reduce downtime when a replacement valve has a long delivery time.
How to Prevent Hydraulic Valve Problems
Preventive maintenance is usually cheaper than emergency repair.
Keep Hydraulic Oil Clean
Use the filtration system recommended by the machine manufacturer.
Furthermore, inspect filters regularly and replace them when necessary.
Check Hydraulic Connections
Regularly inspect hoses, fittings, valve joints, and sealing points.
This helps detect small leaks before they become major failures.
Monitor Hydraulic Pressure
Abnormal pressure changes can provide an early warning of pump, valve, or system problems.
Therefore, pressure trends should be monitored instead of waiting until the machine stops.
Inspect Solenoid Valves
Check solenoid coils, connectors, and wiring during routine maintenance.
Loose electrical connections can cause intermittent valve failures that are difficult to diagnose later.
Follow the Valve Manufacturer’s Specifications
Finally, do not use one universal maintenance specification for every hydraulic valve.
Clearance, pressure range, coil voltage, seal material, and service intervals can vary between different valve models.
Always use the technical documentation for the specific valve installed on the die casting machine.
When Should You Contact a Professional?
Some hydraulic valve problems are relatively simple. Others require specialized hydraulic testing equipment and technical experience.
You should consider professional support when:
- The valve repeatedly fails after cleaning
- Hydraulic pressure remains unstable
- Internal leakage is suspected
- The valve body or spool is damaged
- The machine cannot complete the injection cycle
- The correct replacement valve is difficult to source
- The hydraulic circuit is complex
In these cases, troubleshooting the complete hydraulic circuit is usually more effective than replacing individual components without testing.
Haichen Hydraulic Valve Troubleshooting and Support
Haichen provides die casting machines and technical support for hydraulic systems used in die casting production.
When a hydraulic valve problem occurs, our engineers can help analyze the machine symptoms, hydraulic circuit, valve configuration, and operating conditions.
Depending on the actual problem, the recommended solution may include:
- Hydraulic valve inspection
- Fault diagnosis
- Valve cleaning
- Seal replacement
- Hydraulic circuit inspection
- Pressure testing
- Component replacement
- Machine commissioning
Most importantly, the correct troubleshooting method starts with identifying the actual cause rather than replacing parts blindly.
Conclusion
Hydraulic valve problems in die casting machines can result from contamination, seal wear, spool problems, pressure-control issues, or electrical faults.
Therefore, technicians should troubleshoot the system step by step.
First, check the hydraulic oil and leakage. Then inspect the valve, spool, solenoid, pressure, and electrical signals.
After that, repair or replace the damaged component according to the manufacturer’s specifications.
With regular hydraulic oil management, valve inspection, pressure monitoring, and preventive maintenance, manufacturers can reduce unexpected downtime and extend the service life of their die casting machines.
If you are experiencing a hydraulic valve problem in a die casting machine, providing the valve model, machine model, fault symptom, and hydraulic pressure data can make diagnosis much faster.


